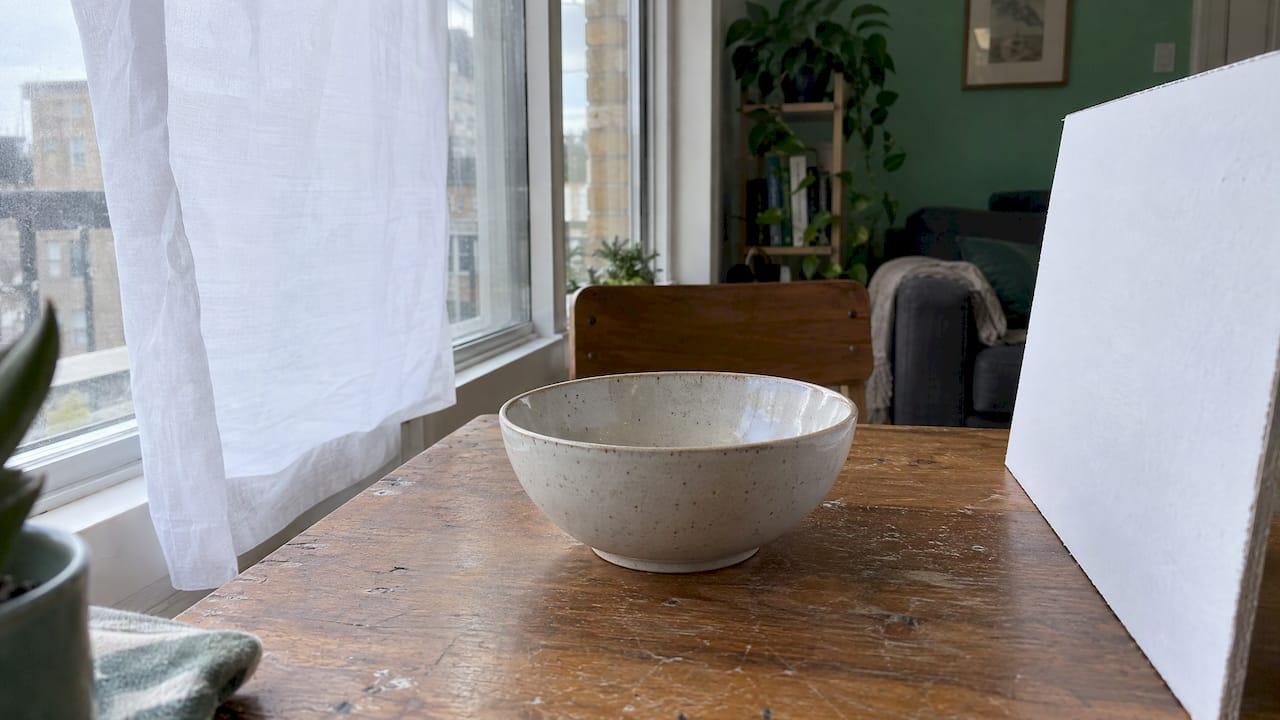
Good product photo lighting comes down to three choices: use one large, soft light source, place it beside your item rather than in front of it, and keep every other light in the room off. A big window, a white sheet and a sheet of white card will do all of that for free. Do it right and buyers see your item's true color, texture and condition, which is exactly what a local buyer wants before they message you or drive across town.
This guide is for people selling things from a home, garage or closet: the old camera, the leather jacket, the bike helmet, the lamp. You don't need a studio. You need to understand what light does, and a few minutes by a window.
TL;DR
- Use one soft light source, ideally a large window with indirect light, and switch off every other lamp so colors don't mix.
- Place the light to the side of the item. Front light flattens, side light shows shape and texture.
- For shiny or glass items, make the light bigger and softer, and use white card to fill dark reflections instead of aiming a lamp at the item.
- Keep colors honest: a photo that doesn't match the real item leads to disappointed buyers and wasted trips.
- Fix the light first, then crop and brighten lightly. Never edit out scratches or flaws.
Table of Contents
- Why lighting matters more than your camera
- The best free setup: a window, a sheet and a card
- What to do when the window isn't an option
- Beating glare on shiny, glass and metal items
- Adjusting for size, shape and surface
- Keep the color honest
- Common mistakes and how to fix them
- From good light to a listing that sells
- Turn your photos into a sale
- Our perspective
- FAQ
- Sources
Why lighting matters more than your camera
A camera does not see objects. It records light bouncing off them. That is why a phone photo taken by a good window can look better than an expensive camera photo taken under a ceiling bulb.
According to KEVOS's product photography guide, three properties of light decide most of the result:
- Size of the source relative to the item. Large sources such as a softbox or a window with a sheer curtain give soft light with gentle shadows. Small sources such as a bare bulb or direct sun give hard light with sharp shadows and hot spots.
- Direction. Front light flattens an item, side light reveals shape and texture, and back light outlines the edges.
- Color temperature. Daylight is roughly 5,000 to 6,500 K and looks neutral to bluish. Household incandescent bulbs are roughly 2,700 to 3,200 K and look warm. Mixing the two creates color casts that are hard to correct.
Those three ideas explain almost every tip you will read below.
There is a practical stake too. A peer-reviewed study in the European Journal of Marketing on color in online fashion retail, summarized by the Coinis blog, linked color-inaccurate product photos to lost sales, more returns and more complaints. In local selling there are no returns desk and no shipping label, but a buyer who arrives and finds the "navy" sweater is actually black will simply walk away. Accurate light saves both of you a trip.
The best free setup: a window, a sheet and a card
For most secondhand items, window light is the right starting point. Here is the routine.
Step 1: Pick the right window and the right time
Choose the largest window in the house, ideally one that is not getting direct sun at the moment you shoot. Direct midday sun is a small, hard source: it throws sharp shadows and burns out highlights. Overcast daylight, or a bright window with the sun off to one side, works like a giant softbox.
If the sun is streaming in, hang a thin white bedsheet or sheer curtain over the glass. This spreads the light and softens it. A thin sheet is better than a thick one: you want light diffused, not blocked.
One caution: natural light changes fast. Adobe's product photography tips quote a photographer who points out that a cloud passing mid-shoot can suddenly put you in totally different light. For a single item that is no problem. For a batch of items you want to look consistent, shoot them all within a short window of time.
Step 2: Put the item beside the window, not in front of it
Set a table, a stool or a clean chair next to the window so the glass is at the item's side, roughly 90 degrees from the camera's line of sight. Aperture Authority's home guide recommends side window light for this reason: the side angle lets texture and shape show, while a light directly behind the camera makes everything look flat.
If you shoot with the window behind your item, you will get a bright halo around it and a dark front. That backlight look works for outlines, but it is wrong for showing the condition of a surface.
Step 3: Fill the dark side with a white card
Side light leaves the far side of the item in shadow. Put a sheet of white foam board, poster board or even a large piece of white paper on the opposite side of the item from the window. It bounces light back and lifts the shadows. Move it closer for brighter shadows, farther for more contrast. A shadow with some depth is good: it tells the buyer the item has a shape.
Step 4: Turn off every other light
This is the step most people skip. A camera can correct for one color of light but not two at once. If a window lights one side and a warm ceiling bulb lights the other, Picarm's guide explains, you end up with a warm side and a cool side that no single white-balance correction can fix. Pick one kind of light and switch everything else off.
Step 5: Steady the camera and shoot
Use a tripod or lean your phone against a stack of books. Use the two-second timer, which Aperture Authority suggests to reduce camera shake. On a dedicated camera, the same guide gives f/8 to f/11 as a starting aperture so a small item is sharp from front to back. On a phone, tap the item to focus and slide the exposure down slightly if the whites look blown out.
What to do when the window isn't an option
Evening listings are common: many people clear out the garage after work. Daylight is gone, and ceiling lights give you yellow, patchy photos. You have two good options.
A daylight-balanced LED lamp. Look for lights in the 5,000 to 5,500 K range, which matches daylight. The ProductAI beginner's guide recommends that range and puts a decent LED panel kit at $40 to $80 as of its April 2026 publication, with two soft lights at about 45 degrees to the item for even illumination. A single desk lamp with a daylight bulb works for small items, as long as you diffuse it through white fabric or parchment paper and make sure the bulb does not get hot against the material.
Bounce it. The V-Flat World guide to one-light setups describes bouncing a single light off a neutral ceiling and using tabletop reflectors to soften shadows, and notes that indirect light suits reflective electronics and glassware. Point the lamp at a white ceiling or wall, not at the item, and the whole wall becomes your soft source.
A light tent, the small fabric cube sold for tabletop photography, gives very even light. The tradeoff is that it can flatten an item by removing the shadows that give it shape, so use it for small, simple objects like jewelry or small gadgets, and keep a side light handy for everything else.

Beating glare on shiny, glass and metal items
Glare is the number one lighting complaint in listings for electronics, appliances, cookware, glassware, watches and car parts. The cause is simple: shiny surfaces act like mirrors, so they reflect your light source, your window, and you. The fix is to control what they reflect.
Make the light bigger and softer
The broader and more diffuse your light, the gentler the reflection. Behind the Shutter's lighting basics says to use broader, more diffuse light as surfaces become more reflective. In practice: put the sheet or diffusion material closer to the item, or use a bigger piece of it.

The physics backs this up. Frame & Focal reports that a bare 100 W bulb creates hard, defined shadows, while the same bulb in a large octabox gives a dramatic reduction in shadow-edge contrast. Soft light wraps around form, while hard light emphasizes texture but risks blown-out highlights on reflective surfaces. For a worn leather bag you may want some of that texture. For a stainless steel toaster you don't.
Move the light, not the item
Expert Photography advises placing light beside or behind reflective subjects and using white or silver bounce cards to push light into dark areas, rather than shining light along the path into the camera. Thrive Product Studio adds that changing a light's height and side angle can move its reflection out of the camera's view. Small shifts matter: try raising the light a few inches or moving it a foot to the side, then check the screen.
It also recommends continuous light, the kind that stays on, for reflective objects, because you can watch the reflections change as you move things. A window or a daylight lamp does exactly that.
Watch what is behind and around the item
A colored wall or shirt can reflect into a shiny surface. Increase the distance between your item and a colored background to reduce reflected color, as the same Thrive guide suggests. Wear a plain dark top, and stand slightly off the item's reflection path. A pure white background can also bleed onto the item's edges: The Digital Picture's setup guide notes it can reduce edge crispness, so a light gray or off-white surface is often easier to work with.
Cut glare at the lens
V-Flat World demonstrates a circular polarizer, a filter that mounts on a camera lens, as a way to reduce glare and reveal more detail on glossy products. It also warns that backlight can cause unwanted reflections on glossy items. Fix the setup first. A filter is an extra for sellers who photograph glossy things often.
A quick example: photographing a stainless steel mixer
- Place the mixer on a plain table a couple of feet from a bright window, covered with a sheet.
- Hang a white sheet of card on the side opposite the window to fill the dark side.
- Take a photo and look for bright white patches. If you see the window itself reflected, move the item or the camera a few inches.
- Turn off the kitchen lights so the metal doesn't pick up a warm cast.
- Take the angle shots: front, side, top, and a close-up of the control dial and any scuffs.
If you sell metal items regularly, a checklist on listing optimization steps can help you go through the rest of your listing with the same care you gave the lighting.
For small shiny items specifically, our guide on photographing jewelry for sale goes deeper on a home setup.
Adjusting for size, shape and surface
Not every item wants the same light. Use this as a quick reference.
| Item type | Best light | Watch out for |
|---|---|---|
| Clothing, bags, textiles | Side window light with a white card fill | Mixed bulbs causing color casts, wrinkles that shadows exaggerate |
| Electronics and screens | Indirect, bounced light | Window or lamp reflected in the screen |
| Glassware and ceramics | Large soft light beside or behind the item | Bright edges, reflections of you |
| Metal tools and appliances | Diffused side light, white fill card | Hot spots, color reflected from walls |
| Furniture and large items | Several windows or a bright room, lights off, shot from a distance | Shadows from other furniture, yellow ceiling light |
| Small collectibles and jewelry | Soft light with a small reflector | Fingerprints, dust, hard shadows |
For large items like a sofa or a bike, you can't bring them to a window. Open all the curtains, switch off the lamps, shoot during the brightest time of day and stand back. Take extra shots in the same light for details.
Keep the color honest
The point of a listing photo is a truthful first impression. Here are habits that protect it.
- One light type only. Don't mix daylight with warm bulbs.
- Set white balance. KEVOS advises photographing a gray card or color checker at the start of a session to set white balance, but a plain white sheet of paper in the first frame also helps you see if the whites look yellow or blue.
- Compare to the real thing. Hold the item next to your screen in daylight. If the colors differ, adjust.
- Edit lightly. KEVOS says cropping, exposure and color matching and dust removal are acceptable, while removing defects or changing the item's shape, color or finish is not. For secondhand sales that last part is the rule to remember: show the scratch, the stain, the worn corner. Buyers trust a seller who does.
Want to size and compress your photos for upload after you have shot them? See our guide to photo size for listings.
Common mistakes and how to fix them
Shadows that fall straight behind the item. Your light is too close to the camera. Move it to the side.
A yellow or blue tint. You are mixing lights. Turn off the room lights or move to the window.
White items that look gray. The camera is underexposing. Increase exposure slightly or move the item closer to the light.
Hot white patches on shiny surfaces. Your source is too small or too direct. Diffuse it, enlarge it, or change its angle.
Dark, muddy photos. Move closer to the window or add a white card. Don't rely on a phone flash, which is a tiny, hard light pointed straight at the item.
Cluttered background. Light shows everything. A plain wall, a tabletop or a sheet keeps the eyes on the item.
From good light to a listing that sells
Once the lighting is solid, a few other things lift your results. Take several angles, include a close-up of any flaws, and add a short, honest description. Our listing description tips show how to write the words that go with the photos, and the mobile-first launch routine explains how to get early views once you post. If you list the same item in more than one place, one master listing with 6 to 8 photos keeps your pictures and details consistent.
Turn your photos into a sale
Once your photos are ready, you can list on Marketplace straight from your phone. The app is built for local selling: listings are organized by category, including electronics, fashion, vehicles, pets, home and garden, hobbies, health and beauty and entertainment. Buyers nearby find you through location-based search, you can talk to them through instant chat, and payments are secure, with verified seller ratings on the platform.
Start with your photos and create the listing, or browse what is already listed nearby on Marketplace.

Our perspective
We think photo lighting is the cheapest upgrade a seller can make. Most items that sit unsold are not overpriced, they are just hard to read: a dim photo, a yellow cast, a window reflected in a screen.
Local selling works best when a buyer can judge an item from the listing alone and decide quickly whether it is worth a message. That is what our listing flow, instant chat and location-based search are built for: a fast, easy listing, and a buyer nearby who can ask a question and arrange a pickup.
So spend five minutes by a window before you list. Take the extra shot of the label, the corner, the flaw. Then post it and let the neighbors find it. Clear light does the selling, and the app puts it in front of the people who live down the road.
Marketplace
FAQ
What is the best lighting for product photos at home?
Soft, indirect light from a large window is the best free option. Put the item beside the window, diffuse harsh sun with a white sheet, add a white card on the opposite side to lift shadows, and switch off other room lights. In the evening, a daylight-balanced LED lamp diffused through white fabric is a good substitute.
How do I avoid glare in photos of shiny items?
Make the light source bigger and softer, and keep it beside or behind the item instead of in front. Move the light or the camera a few inches until the bright reflection disappears, and use white or silver card to fill dark areas. A circular polarizing filter on the lens can also reduce glare.
Is natural light or artificial light better?
Natural light is free and gives accurate color and texture when it is soft, but it changes with clouds and time of day. Artificial daylight-balanced light stays constant, which helps when you photograph several items. Either works; the key is to use only one kind at a time.
Do I need a light tent or softbox?
No. A window and a sheet do the same job for most items. A softbox or light tent gives even, repeatable light if you photograph small items often, though a tent can remove shadows that show shape, so keep a side light option as well.
Can I edit my photos before listing?
Yes, light edits such as cropping, brightening and color matching are fine. Don't remove scratches, stains or other flaws, or change the color of the item. An honest photo sets the right expectation and leads to a smoother meetup.
Sources
- KEVOS: product photography for manufacturers, lighting
- Coinis: color cast and product photos
- Adobe: product photography tips and techniques
- Aperture Authority: how to photograph products at home
- Picarm: lighting for product photos
- ProductAI: product photography setup for beginners
- V-Flat World: one-light product photography setups
- Behind the Shutter: product photography lighting basics
- Frame & Focal: product photography lighting
- Expert Photography: reflective surfaces and shiny objects
- Thrive Product Studio: minimizing glare in studio
- The Digital Picture: general purpose product photography setup