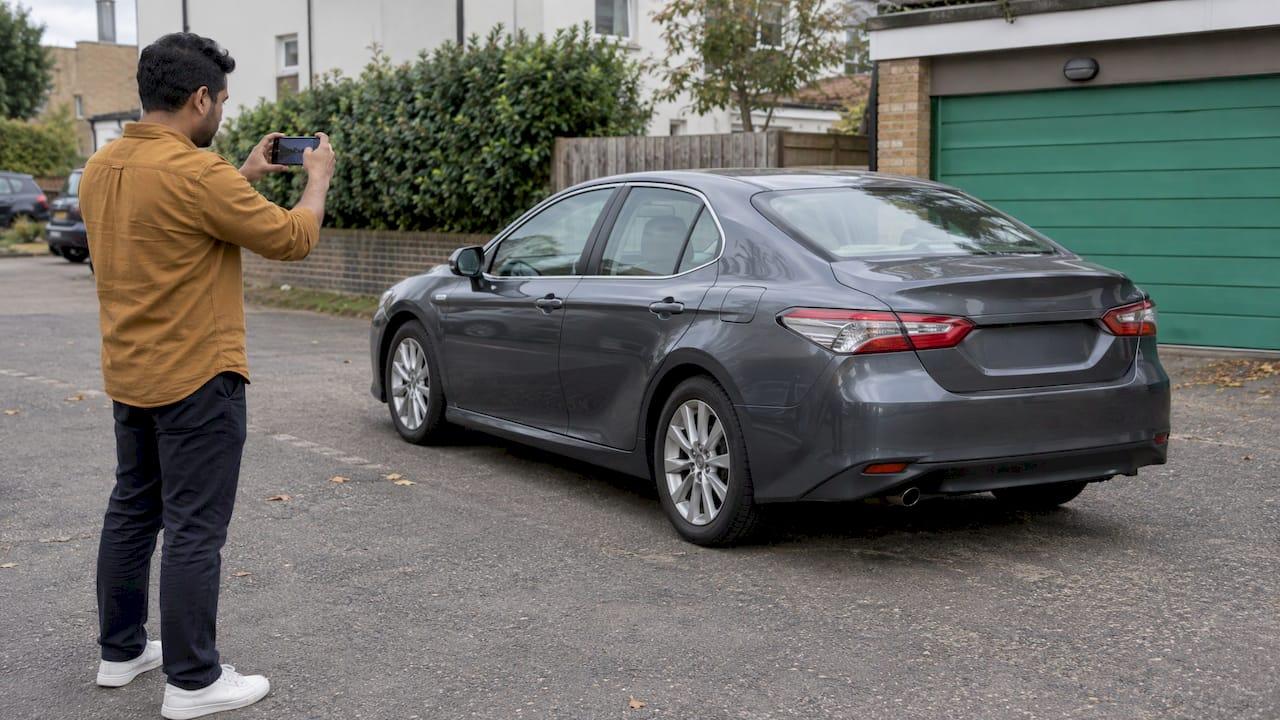
To photograph a car for sale, clean it thoroughly, park it somewhere plain in soft light, and shoot it level with your phone held sideways. Then cover every part a buyer will want to inspect: all sides, the interior, the engine bay, the tires and any flaws. Buyers shopping locally decide from the photos whether a car is worth a drive across town. When you list on Marketplaceapp, those photos are what a nearby buyer sees first, so they decide how many messages you get and how much haggling you face.
This guide walks through the whole job with a phone, in the order you would do it.
TL;DR
- Prep matters more than the camera: a clean, empty car in even light beats an expensive lens on a dirty one.
- Shoot in the early morning, late afternoon or under an overcast sky, in landscape orientation, with no flash and no filters.
- Cover a fixed checklist: exterior corners and sides, wheels, interior, dash with the odometer, engine bay, trunk and paperwork.
- Photograph flaws up close, with a size reference. Honest photos build trust and cut down on price haggling.
- Upload original files, keep personal details out of the frame, and put your strongest front-corner shot first.
Table of Contents
- Why photos decide whether a car sells
- Prepare the car before you pick up the phone
- Get the light right
- Phone settings that make a difference
- The shot list: what to photograph
- Show the flaws, up close
- Order and presentation
- Once the photos are done
- Where to list the finished photos
- Our perspective
- FAQ
- Sources
Why photos decide whether a car sells
A listing for a used car asks a stranger to trust you with a large amount of money. The text can state mileage and condition, but the pictures are the proof. A buyer scrolling through local listings will pass over a car with three dark, crooked shots and stop on one that looks cared for.
Capital One's car-buying guidance makes the point plainly: the goal of listing photos is to give buyers information, not to make art. That is good news if you are a casual seller. You do not need artistic skill. You need to be thorough, clear and honest.
There is also a practical payoff. Buyers who see the tires, the dash and the dent in advance arrive knowing what they are getting. Fewer surprises at the curb means fewer awkward renegotiations and fewer no-shows.
Prepare the car before you pick up the phone
No edit hides a dirty car, and a buyer who spots dust on the dash tends to assume the rest of the car was neglected too. So prep comes first.
Fix, clean, empty
Hemmings' photo guide for sellers recommends making quick repairs before you list, then cleaning the interior, the engine bay and the trunk as well as the outside. It also explains why: problems you leave for the next owner keep serious buyers away and give hagglers an excuse to push the price down.
A sensible prep order:
- Small repairs. Replace a dead bulb, a missing trim clip or a cracked cap. These cost little and remove easy objections.
- Wash and dry the exterior. Wax if you have time. Clean the wheels and tire sidewalls too, since you will photograph them.
- Clean the glass. Streaks and oily haze show up badly in photos, especially when the sun hits the windshield. A car glass oil film remover clears that haze from the inside and outside of the windows so reflections stay clean.
- Vacuum and wipe the interior. Do the seats, carpets, door pockets, cup holders and dash. Clean the infotainment screen and the gauge cluster.
- Clear out your stuff. B&H's photo tips for sellers say to remove anything that is not included in the sale: phone mounts, chargers and rubber floor mats. Take out air fresheners, sunglasses and loose papers as well.
- Clean the engine bay and trunk. Wipe dust and leaves off the engine cover, and empty the trunk completely.
If you are clearing out a whole garage at the same time, the cleaning job can feel bigger than it is. A realtor cleanout checklist shows how to work through a large space in a sensible order, from authority to handoff, which helps when the car has been parked in a cluttered garage for months.
Choose a plain location
The background should not compete with the car. Hemmings suggests an evenly lit, uncluttered spot, with a backdrop that contrasts with the paint, and says pavement, asphalt or concrete works best for passenger cars. B&H adds that a crowded used-car lot or a messy driveway makes photos forgettable, and that a quiet, unusual location suited to the vehicle can help the buyer picture owning it.
Good options in any neighborhood:
- An empty parking lot on a Sunday morning
- A quiet street with no parked cars behind you
- The far end of an office or school lot after hours
- An open field edge or a plain wall, if the car suits it
Avoid trash cans, other cars, your neighbor's laundry line and your own house number. Keep your license plate readable if you like, but think about whether you want your home address visible in the background.
Get the light right
Light does more for a car photo than any setting on your phone. Paint is reflective, so harsh sun creates glare spots and deep shadows that hide the car's shape.
Hemmings recommends early morning, late afternoon or an overcast sky for even lighting. Photographer advice quoted by Drive.com.au in its phone photography guide is to look for soft, even light with the sun at about a 45-degree angle to the car. Both agree on the flash: leave it off.
Practical rules:
- Face the side you are shooting toward the light. Photograph one side, then turn the car around to light the other side, rather than walking around and shooting into the sun.
- If a patch of the car sits in dark shadow or bright glare, move the car. Moving ten feet is easier than fixing it afterward.
- Never shoot straight into the sun. It washes out the paint and flattens the image.
- Use open shade at midday. The shadow of a large building works well if the car is fully inside it.
- Check the reflections. Look for yourself, a bright shirt or a nearby building mirrored in the doors, and step to the side.
A sunny afternoon at 1 p.m. is the worst time. If that is the only window you have, find shade or wait for a cloud.
Phone settings that make a difference
You do not need a dedicated camera. The phone in your pocket is enough if you use it well.
- Hold it sideways. Landscape shots fit a listing page and show the whole car. Bring a Trailer-style walkarounds and most listing sites expect wide images, and so do buyers scrolling on a phone.
- Use the main lens. The standard wide lens, or at most a 2x lens, keeps proportions natural. The ultra-wide lens stretches the nose of the car and bends the sides, which makes the car look wrong in person.
- Step instead of zooming. Move closer or farther away to frame the car. Digital zoom loses sharpness.
- Turn on the grid. Lines help keep the horizon level and the car straight.
- Tap to focus. Tap on the car, then slide the exposure down a little if the paint is white or silver and washing out.
- Skip the flash, portrait mode and filters. Capital One notes that no flash is needed if the time of day is right and that automatic mode on a modern phone is sufficient.
- Crouch. Kneeling puts the lens at about the height of the car's middle and keeps the shot level, rather than looking down on the roof from eye height. The Drive.com.au photographer also suggests keeping the camera angle modest and turning the front wheels toward the camera so the wheel design shows.
Finally, keep the picture quality high and send the original image files. For the details of sizes and resolution, see our guide on photo size for listings.
The shot list: what to photograph
Buyers will ask for any angle you leave out. Cover these once and your inbox gets quieter. Work in the same order each time so you do not forget anything.
Exterior
Stand back far enough to fit the whole car with some space around it, with the hood, trunk and doors closed.
- Front three-quarter view (driver's side corner): this is usually the best lead photo
- Front three-quarter view (passenger side)
- Rear three-quarter views, both sides
- Straight side profile, both sides
- Straight front and straight rear
- Roof, if it is a sunroof, convertible or has racks. For a convertible, photograph the top both up and down.
- Each wheel, so the rims and any curb rash are visible
- Headlights, taillights and any trim you want to highlight
Tires
Tire condition tells a buyer about upcoming costs. Capital One shows a simple way to display tread: hold a quarter in the groove with Washington's head pointing down, and photograph it. If the tread covers part of his head, there is more life left in the tire.

Interior
Open the doors and shoot from the opposite side of the cabin so the whole row of seats fits.
- Front seats and rear seats, from both sides
- Dashboard and steering wheel
- Gauge cluster with the odometer readable. Turn the car on with the lights on so the screen and gauges are lit.
- Infotainment screen and climate controls
- Door panels and footwells
- Headliner
- Cargo area with the trunk or hatch open
- Any extras you are including, such as a spare key, the manual or a roof rack
Under the hood and the paperwork
Photograph the engine bay with the hood fully open, clean and well lit. If you have service records, photograph a few pages to show regular maintenance. Cover or crop out your name, address and other private details first. A photo of the VIN plate on the dash is useful for buyers who want to run a history report, so it is worth including.
Show the flaws, up close
It feels backward, but photographing the scratches helps you sell. Hemmings notes that showing blemishes accurately builds buyer confidence in the rest of the description. Capital One adds that damage and condition shots, including the undercarriage and tires, are crucial.
How to do it well:
- Take a close-up of each dent, scratch, stone chip, rust spot or torn seam.
- Put a coin or your hand next to it so the size is clear.
- Mention each one in the description too, with the same wording the buyer can match to the photo.
The result is a buyer who arrives expecting the dent and still wants the car. A buyer who finds it unexpectedly at the curb starts by asking for a discount or walks away.
Order and presentation
The first photo is the one that shows up in search results and local feeds, so it should be your cleanest front three-quarter shot in good light. After that, follow the same logic a buyer would when walking around the car: exterior, wheels, interior, engine, trunk, then flaws and paperwork.
Some habits that help:
- Put the best photo first, flaws last. Do not hide them, but let the first impression be the car at its best.
- Do not add text, borders or collages. They are hard to read on a phone and make the listing look like an ad.
- Do not edit the car. Light brightness and a straightened horizon are fine. Removing dents, changing paint color or blurring damage is misleading and costs you the sale once the buyer sees the real car.
- Skip your own details. Check the frame for your house number, mail and anything with your name on it before you upload.
For a vehicle, the more complete the gallery, the better. A smaller set works for a lamp or a pair of shoes, as our guide to crossposting with one master listing explains. A car deserves a full walkaround.
Once the photos are done
Photos get the click. The description closes the deal, so match each photo to a fact: mileage, trim, service history, known issues and why you are selling. Our tips on writing a listing description cover that part. When you publish, the first couple of days matter most for views, which is what our mobile-first launch plan is built around.
When buyers reply, stay careful with payment. A screenshot of a transfer is not money in your account, and our guide to vehicle payment safety explains how to confirm funds before handing over keys and title. For the full process from listing to handover, read how to sell your car locally. If you are on the buying side, the test drive checklist shows what to look at in person once you have studied a seller's photos.
Where to list the finished photos
Once your gallery is ready, the next question is who sees it. Marketplaceapp is a local marketplace where buyers browse vehicles and many other categories near them, and message sellers directly through instant chat. Its location-based search puts your car in front of people who can actually come and see it, and push notifications mean you hear about new messages quickly. Our site describes secure payments and verified seller ratings, so serious buyers can see who they are dealing with before they reach out.
You can list your car on Marketplaceapp in the Vehicle category, alongside electronics, fashion, home and garden and more, whether you are selling a daily driver or clearing out a garage full of items.

Our perspective
Most local car listings lose buyers in the first three seconds, and not because of the car. A dark, tilted photo of a dirty interior tells a neighbor you did not care, so they scroll on.
We built Marketplaceapp around the idea that selling locally should be quick and easy. That includes the list step: a photo gallery you can shoot in one afternoon with the phone you already own, then publish from the same device.
What we have learned from writing our selling guides is that preparation and honesty beat equipment. Clean it, light it evenly, show every angle, show the flaws. Then let a nearby buyer message you directly, ask what they want to know and arrange a time to see the car.
A car sale is a local transaction between two people who live a few miles apart. Good photos set that up properly: the buyer knows what to expect, you know they are serious, and the handover goes the way both of you planned.
Marketplace
FAQ
How many photos should I post of a car for sale?
Post enough to cover every item in the shot list above: exterior corners and sides, wheels, tires, interior, dash and odometer, engine bay, trunk, paperwork and each flaw. A car needs far more than the handful that suits a small household item. If a buyer would ask to see it, photograph it.
Can I take good car photos with just a phone?
Yes. A modern phone in automatic mode is enough when the light is right, as Capital One's guidance points out. Use the main lens, hold the phone sideways, skip the flash and filters, and step closer instead of zooming.
What is the best time of day to photograph a car?
Early morning and late afternoon give soft, angled light, and an overcast day works at any hour. Avoid midday sun, which creates glare and hard shadows on the paint. If you have to shoot at noon, park the car fully in open shade.
Should I show scratches and dents in the photos?
Yes. Take a close-up of each one with a coin or your hand for scale, and mention it in the description. Buyers who see the flaw beforehand tend to trust the rest of your listing and are less likely to haggle after the viewing.
What should I leave out of the pictures?
Remove personal items, mail, house numbers and anything that shows your name or address. If you photograph service records, cover private details first. Also remove items that are not included in the sale, so buyers do not assume they come with the car.
Sources
- Car Photography 101: A few minutes of photo prep will help bring top dollar to your online car listing (Hemmings)
- Selling a Used Car? Here are 20 Photo Tips! (B&H eXplora)
- How to Take Better Photos for Your Used-Car Listing (Capital One Auto Navigator)
- How do I take great photos of my car using my phone? (Drive.com.au)
- Car Glass Oil Film Remover (VisiVault)
- Realtor Cleanout Checklist: From Authority to Handoff