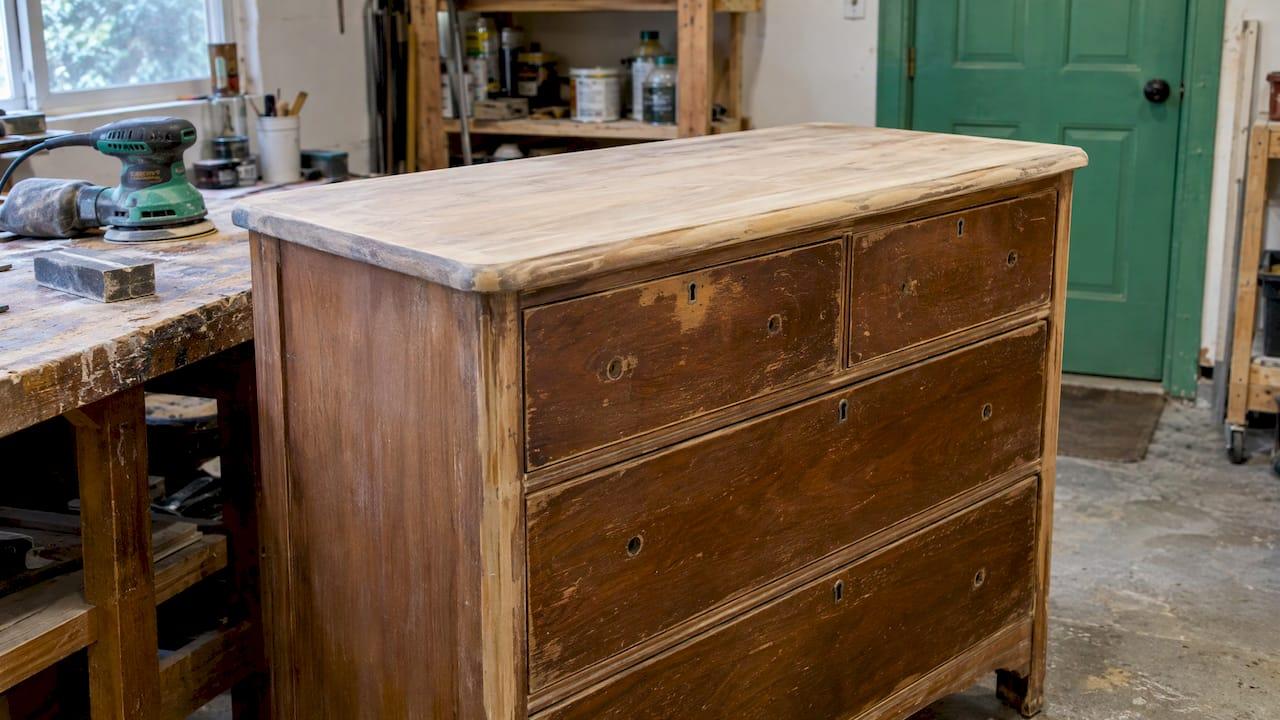
Refinish furniture for resale by choosing sound pieces with cosmetic flaws, doing the least work that makes the piece look clearly better, and pricing it from what similar pieces actually sold for nearby. Most of the profit is made at the buying stage, long before you pick up sandpaper. This guide covers how to choose a piece, fix scratches, strip or paint, seal, count your real costs and list the finished piece locally.
TL;DR
- Buy structurally solid wood or good veneer with surface damage. Loose joints, rot and broken frames cost far more to fix than scratches and a tired finish.
- Match the effort to the damage: a clean and a scratch touch-up often beats a full strip, and a full restoration only makes sense when the piece can sell for a lot.
- Count everything: purchase price, supplies, hardware, fuel, fees and your own hours. If the numbers only work at the highest asking price, pass.
- Wear a respirator and gloves, ventilate, and be careful with old paint. Federal lead-paint rules only cover furniture made after 1978.
- Price from local sold prices, photograph in daylight and list where buyers can come pick it up.
Table of Contents
- Pick the right piece before you touch it
- Run the numbers first
- Tools, materials and safety
- Fix scratches and surface damage
- Refinish step by step
- Perspective
- Photograph, price and list the piece
- List your refinished piece on Marketplace
- FAQ
- Sources
Pick the right piece before you touch it
The best flip candidates are pieces that are solid underneath and ugly on top. A guide to preparing used furniture for resale says to check joints, frame, drawers, doors, legs, water damage, rot, cracks, odors and missing parts before you buy, and notes that cosmetic damage is generally safer than major structural repair. A Habitat for Humanity ReStore buying guide makes the same point: construction is much harder to fix than surface imperfections.
A 60-second inspection in the seller's driveway:
- Rock it. Push the piece side to side. Wobble that shifts with a tightened screw is fine. Racking in the frame is not.
- Pull every drawer. Look for dovetail or solid joinery, smooth sliding and intact bottoms.
- Smell it. Smoke, mildew and pet odors are hard to remove from raw wood and upholstery.
- Check the back and underside. Water stains, rot and old repairs show up here first.
- Identify the material. Solid wood and quality veneer on a strong carcass can be refinished. Particleboard and laminate cannot be stripped or sanded the same way.
That last point matters for pricing. One restoration guide for flippers suggests the higher-effort work is viable for solid wood or quality veneer on a strong carcass when local comparable sales support it, and that particleboard or laminate should be capped at light work and never stripped.
Check whether refinishing is even the right move
Not every old finish should be removed. For collector-oriented antiques, original finish and patina can be worth more than a fresh coat, while a dull or damaged finish on design-oriented vintage furniture may justify restoration, according to a vintage furniture restoration guide. If you suspect a piece is a real antique, find out before you sand it. You cannot undo a stripped finish.
Run the numbers first
A flip is worth it only if the expected resale price covers the buy price, supplies, repairs, hardware, transport, your labor and a profit target. That is the test laid out in a furniture flipping evaluation checklist, and it is a good one to apply at the curb.
For vintage pieces, a useful shortcut from the same restoration guide: compare verified sold prices for the piece as-is with sold prices for a well-restored example. The gap is your maximum working budget. Sold prices matter. Active listings only show what people hope to get.
A worked example
A furniture flipping profit guide walks through a solid-wood dresser bought for $40. Materials come to $45, new pulls to $20 and fuel to $12, so costs total $117. A $260 local cash sale leaves $143 before labor. The same guide counts acquisition, materials, hardware, tool wear, fuel, selling fees, storage space and the value of your own hours as costs to subtract.
That last item is the one beginners skip. If the dresser takes you ten hours, $143 is about $14 an hour before you count anything else. It is still a fine result for a weekend project, but know which one you are doing: earning an hourly wage or enjoying a hobby that pays for itself.
Match the work to the payoff
The cheapest treatment that makes a visible improvement usually wins. These are the effort and cost ranges from the restoration guide for solid wood:
| Level of work | Active time | Materials | Notes |
|---|---|---|---|
| Clean only | 45 to 90 minutes | $0 to $8 | Typical value lift of $60 to $150 |
| Minor repair | 1.5 to 3 hours | $5 to $30 | Tighten, fill, touch up |
| Paint or partial refinish | 4 to 9 hours | $25 to $80 | Best for dated but sound pieces |
| Full restoration | 10 to 25+ hours | $60 to $150+ | Recommended only where the resale ceiling is at least $500 |
These are one source's estimates, so treat them as a starting point and adjust for your local prices and supplies.
Other figures vary by region. One U.S. pricing table lists $10 to $120 for materials and $20 to $200 for refurbishing or minor repairs per item, using Midwest-to-Northeast rate assumptions. Your own receipts beat any table.
Our separate guide on how to price used items so they sell covers the pricing side in more detail.
Tools, materials and safety
A basic refinishing kit, per a thrift dresser flip tutorial, includes:
- Screwdrivers, pliers and a hammer
- Wood glue and clamps
- Wood filler
- 80, 120 and 220 grit sandpaper, and optionally an orbital sander
- Tack cloth and a drop cloth
- A respirator or mask, and gloves
For chemical stripping, add chemical-resistant gloves, an organic-solvent respirator with fresh filters, a protective apron, splashproof goggles, scrapers, brushes, putty knives and steel wool, as listed in This Old House's stripping guide.
Ventilation, disposal and fire
The same guide says to work in a well-ventilated area, take breaks, keep your protective equipment on for the whole job, collect waste in sealed containers and check local disposal rules. Never pour stripping chemicals down a drain or onto the ground. The Spruce adds eye protection, breathing protection and no open flames around strippers, and says the manufacturer's instructions always take priority. Read the can.
Old paint and lead
The federal rule at 16 CFR Part 1303 covers furniture broadly, including beds, bookcases, chairs, chests, tables, dressers, desks and sofas. It bans specified lead-containing paint on covered furniture manufactured after February 27, 1978. That means a painted piece older than that was not covered by the ban. Before you dry-sand or scrape old paint on a pre-1978 piece, find out what is in it, and talk to a certified lead professional or your local health department if you have children or anyone pregnant in the home.
Fix scratches and surface damage
Scratches are the most common flaw on secondhand wood, and the fix depends on depth. The approach below follows This Old House's furniture finish repair guide.
Light scratches and abrasions
- Wipe the area clean.
- Apply a scratch remover matched to the wood tone.
- Buff the area.
- Let it dry.
- Add a light coat of finish.
Test the color on a hidden spot first, such as the back of a leg or the inside of a drawer.
Deep scratches and gouges
- Flatten raised edges with steel wool.
- Clean the damage with mineral spirits.
- Fill with matching stain pens and a repair crayon.
- Level the excess with a plastic razor.
- Recreate the grain with a pen.
- Seal with lacquer or polyurethane.
The principle is to match the fix to the depth. Light marks need color and finish. Gouges need filling, leveling, grain blending and resealing.
Pressed wood and MDF
Boards with a thin laminate surface behave differently. A furniture repair guide from a bedroom furniture retailer recommends matching soft wax to the board, packing deep chips in two or three thin layers, leveling with a plastic applicator and buffing away the excess. This is a quick, low-cost fix that fits the clean-and-repair tier from the table above.

Refinish step by step
When the finish is too far gone for touch-ups, follow the full sequence: inspect, clean, sand, repair gouges and holes, wipe away dust, stain or paint, seal and let it cure. A refinishing guide for resellers suggests starting with 80 or 120 grit to remove the finish, then moving to 150 and 220.
- Clean first. Grease and wax clog sandpaper and block stain. Wash the piece and let it dry.
- Remove hardware. Take off pulls, hinges and anything else you can unscrew. Bag and label the pieces.
- Repair structure. Re-glue loose joints and clamp them until they set. Fill holes with wood filler.
- Sand in stages. Work the flat areas first, then curves and details by hand. Finish with the finer grits so the surface feels smooth.
- Remove dust completely. Wipe with a tack cloth. Dust under paint or stain shows up as bumps.
- Stain or paint. Apply stain evenly and wipe off the excess with a lint-free rag. If you spray, Wagner SprayTech recommends even passes with about 50% overlap, a few hours of drying, a light sanding and a second coat, then drying overnight.
- Seal. The same source says a polyurethane topcoat should go on light rather than heavy, with a second coat if needed.
- Cure. Let the finish harden before you move or stack anything on it. A tacky tabletop in a buyer's car is a bad first impression.
Details that raise the price
New hardware is cheap and changes how a piece looks in photos. In the dresser example above, new pulls were $20 of the total. Replacing missing or mismatched drawer pulls is one of the least expensive ways to make a dresser look finished.
Perspective
We see the same pattern every week among people who sell furniture locally: the pieces that sell quickly are rarely the most heavily restored. They are the ones that are clean, sturdy, honestly described and priced like the neighborhood prices them.
Local buying and selling rewards that kind of preparation. A buyer can sit on the chair, open the drawers and see the finish in person, so a clean surface and a well-fixed scratch do more than a perfect, over-restored finish ever will. Our category pages for home and garden, hobbies and more are built so that a buyer searching nearby finds your piece, messages you directly and arranges pickup without shipping a heavy dresser anywhere.
Our advice is to treat refinishing as a way to move a piece from a $40 curb find to a clean, listing-ready item, then let the marketplace do the matching. Fix what you can fix in an afternoon, photograph it in daylight and let your local buyers come to you.
Marketplace
Photograph, price and list the piece
Start with price. Search for comparable pieces in your area, preferably ones that actually sold, and place yours in line with the same condition level. Be conservative: one flipping guide recommends using a lower-end local comparable, subtracting every cash cost, labor and holding costs, and passing on a project that only works at the highest asking price or values your labor at zero.
Then build the listing:
- Take photos in natural light with the piece against a plain wall.
- Shoot the full piece, the top, an open drawer, the hardware and any remaining flaws up close.
- Include dimensions in the description so buyers can check their space and vehicle. Our guide on how to measure furniture for pickup shows what to measure and why.
- Say what you did: sanded, restained, new hardware, repaired joints.
- State your pickup terms plainly.
For the full selling process, from listing to payment, see how to sell furniture locally and get paid fast. If a piece does not sell, change one thing, such as the photos, the price or the title, and try again. Our relist strategy for local sellers explains how.
Why local sale beats shipping
Furniture is bulky and breakable, and shipping can eat the profit you just earned. The dresser example above shows a $260 local cash sale leaving $143 after costs, while the same guide's eBay example, after a stated 13.6% plus $0.40 fee, leaves $107.24, and that is before shipping a heavy piece. Selling nearby keeps more of the margin in your pocket.

List your refinished piece on Marketplace
When the finish is cured and your photos are ready, you can list it on Marketplace in the category that fits, whether that is Home & Garden, Hobbies or another of our categories. Buyers nearby can find it through location-based search, ask questions through instant chat and get push notifications when new items arrive. Our platform is designed to offer secure payments, seller ratings and buyer and seller protection, so a local sale is simple to complete.

Ready to turn your next project into cash? Browse the categories and list your piece on Marketplace.
If you are clearing out a whole garage or spare room, our guide on making $200 to $800 in a weekend selling furniture and electronics can help you plan the weekend.
FAQ
Is refinishing furniture for resale worth the time?
It can be, if you buy well and count all your costs. Compare your total spend, including supplies, hardware, fuel, fees and your own hours, with what similar pieces sell for nearby. If the project only works at the highest possible price, skip it.
What is the easiest way to fix scratches on furniture?
For light scratches, clean the area, apply a scratch remover that matches the wood, buff it and add a light finish. Deeper gouges need steel wool, a stain pen and repair crayon, leveling and a sealed topcoat. This Old House describes both methods.
Should I strip, sand or paint a piece?
Choose the least intensive treatment that makes a visible difference. A clean and touch-up can be enough, paint suits dated but sturdy pieces, and full stripping suits solid wood that can sell for a high price. Do not strip particleboard or laminate.
Do I need to worry about lead paint on old furniture?
Yes, on older painted pieces. The federal ban on lead-containing paint on furniture applies to pieces manufactured after February 27, 1978, per 16 CFR Part 1303. For older pieces, find out what the paint contains before sanding or scraping, and ask a certified lead professional or your local health department if you are unsure.
Where should I sell refinished furniture?
Sell locally where buyers can see and pick up the piece. It avoids shipping a heavy item and keeps more of your margin. List it in the right category with clear photos, measurements and a price based on local comparable sales.
Sources
- How to Prepare Used Furniture for Resale
- Restoring Vintage Furniture to Increase Resale Value
- How to Buy Used Furniture: 9 Tips
- Restoring Furniture to Flip: Cleaning, Painting and More
- Is This Furniture Piece Worth Flipping?
- Furniture Flipping Profit Guide
- Pricing Furniture for Resale: Cost and Price Ranges
- Thrift Dresser Flip Tutorial
- Everything You Need to Know to Strip Painted Furniture
- How to Refinish Wood Furniture
- 16 CFR Part 1303, Ban of Lead-Containing Paint
- How To Fix Furniture Finish
- How to Repair Scratches and Chips in Bedroom Furniture
- How to Refinish Wood Furniture Before Reselling
- How to Paint and Stain Furniture
- How to Flip Furniture for Profit